
A very steep hike with an amazing 360 view
- Where – Central Island (Port Alberti).
- When – Late spring, summer, early fall (When the snow has melted).
- Why – Summiting Mount Arrowsmith.
- How – hiking (out & back, 6km, 5-7 hours).
- Difficulty – Hard (very steep, requires scrambling, 1006 m elevation gain).
- Cost – Walking is free
Location / Directions
CAUTION! GATE CONTROLLED ROAD, Sat, Sun, Mon 8AM – 9PM. (Link to gate map below).
NOTE: A 4×4 vehicle is not required but a vehicle with about 6 in ground clearance is recommended because of the ruff gravel road conditions.
- From the Alberti Hwy turn onto the Loon Lake Main logging road.
- Continue on Loon Lake Main for 2.7 km.
- Turn left onto Cameron Main / Arrowsmith Ski Rd and continue for 7.8 km.
- Turn left onto Pass Main and continue for 2.9 km.
- Park on the side of the road.
- Beginning of Loon Lake Main: 49.250277, -124.702009
- Parking and trailhead: 49.220993, -124.620594
- Arrowsmith summit: 49.223616, – 124.594488
- Google map link: https://goo.gl/maps/jZvyV3WGBGHq3VmGA
- Mosaic gate map link: • https://www.arcgis.com/apps/webappviewer/index.html?id=d56107a9ffcd4f74b6f7dc99caa80eb8
The Hike
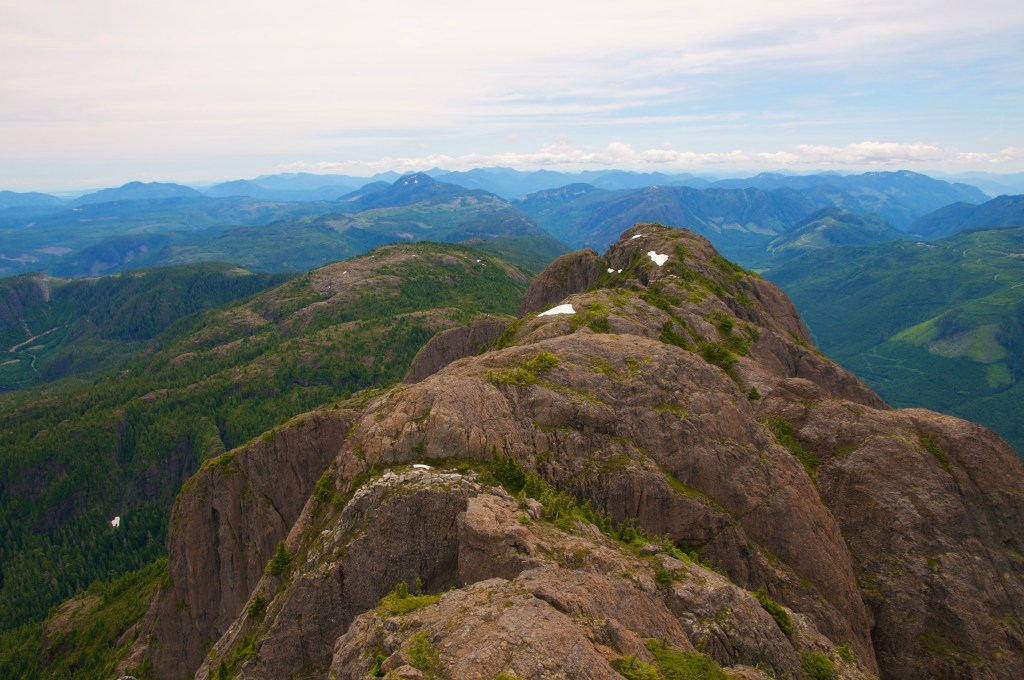
Photo by Mark Dobbs
Mt. Arrowsmith is Vancouver Island’s highest southern peak at 1819 meters. It’s very, very steep and very exposed once you’re out of the tree line. With a lot of elevation gain in a short distance, you’re going to want to take into consideration weather, fitness levels, and experience when planning your hike up Arrowsmith.
From the parking area head north up a logging road with a red gate. Continue for about 350 m until you find an abandoned logging road to the south-east or to the right. Follow it until you find the end of the road and the start of the single-track trail and the begging of the steep terrain and a lot of switchbacks. You may want to take a break at this point. (Note: If you have a 4×4 with high ground clearance and paint you don’t care too much about, and if the red gate is open you can drive to begin on the single track trail).
The first third of the trail is in dense woods and there are many fallen trees and a few washouts on the steep switchbacks. In the dry months, the trail is dusty, loose, and slippery. In the wet months it’s just slippery, so keep in mind that good footing is required so that you don’t slip and fall.
The second third is even steeper and becomes more exposed as the higher you get the fewer trees there are in this subalpine zone. The dust turns to gravel on the trail and is just as loose and slippery. As you climb higher, you’ll trade the fallen trees you’ll have to climb for exposed rocks that may require you to scramble up on your hands and knees. If you have a hiking pole you may want to throw it up ahead to free your hands.
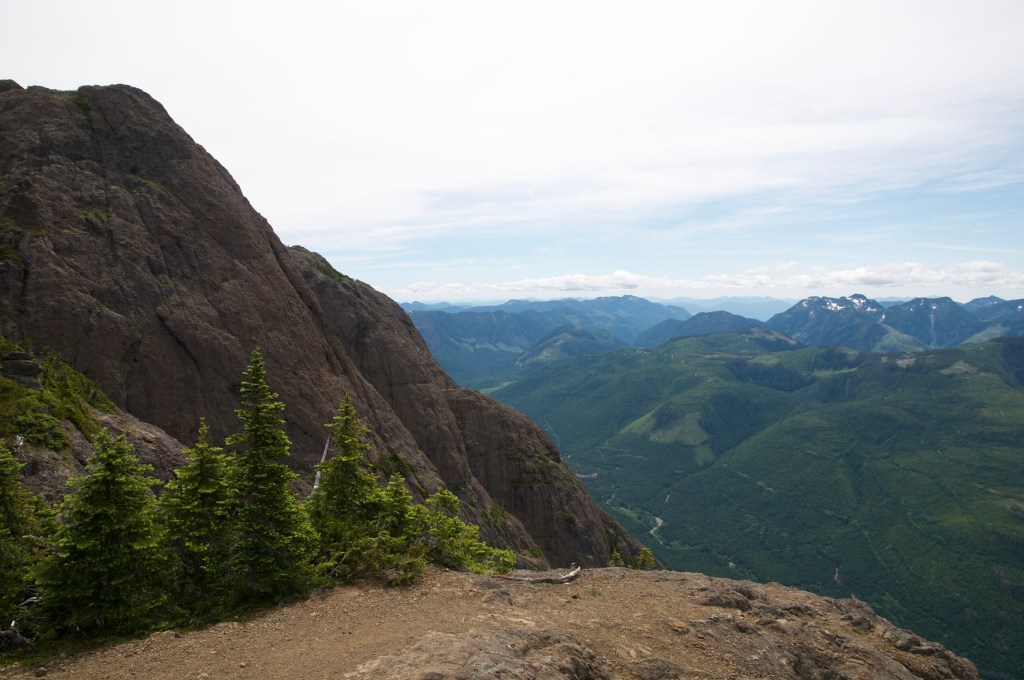
Photo by Mark Dobbs
The last third reaches into the alpine and is completely exposed to wind and weather. The trail is even steeper and looser than before, with more scrambling, more often. The loose gravel becomes larger rocks and boulders that sometimes can fall behind you as you hike over them so use caution if you’re following someone else up and leave room not to get hit by falling rocks. Depending on the time of year (even in the summer) there will be more snow towards the top to navigate, use caution, this goes without saying but snow is slippery.
Just before the top, you’ll reach a flattened-out section with a radio tower, helicopter landing pad, and a great view. This is not the top but close to it. There is one more short, steep climb to the summit. When you reach the top your rewarded with a 360 view. There’s another helicopter landing pad the makes for a great place to have a seat and take a break.
When you’ve had enough time taking in the view and resting at the top you’ll hike down the way you came up. Caution should be used as the way down requires even better footing the then way up as slips or falls are likely to happen more.
Notes:
Gear taken: Backpack, 1.5L water, snacks, first aid kit, windbreaker
Gear used: Everything listed above.
Cell service: At the summit.

